Everything you need to know about the VCP-DTM 2020 Certification Path

My tips for saving money, what you’re really paying for, study guide and advice for passing the VCP-DTM 2020 qualification!

The following post covers my personal experience in studying for the Official VMware Certified VCP-DTM 2020, achieved June 2020, the following steps are covered:

Step 1:Consider a vMug Membership

Step 2: Studying for Foundations 6.7 exam

Step 3: VMware Instructor led training [on demand]

Step 4: Preparing and Passing the VCP-DTM 2020 Exam

Step 1. Consider buying a vMug Membership…

vMug membership will provide around £650 of overall savings for the DTM certification track and provide resources for a home lab and is a great insurance to have if you fear failing the exam (like I do)…

  • vMug costs around $200, but do a quick Google for vMug discount codes prior to signing up to save a further 10% on the signup fee.
  • You save around £550~ on the official VMware instructor-led training [on demand] or In-Class routes.
  • You get a total of 4x 20% exam discount vouchers – 2x for Foundations 6.7 and 2x for any VCP exam – saving you around £30 per re-sit, if needed. You also receive discounts for VCAP if you’re on that path.
  •  You get evaluation licenses for a broad range of vProducts – including vCenter, Horizon Standard, View Composer and Identity Manager – which covers most of what you’ll need for the DTM route.

Sound great! But what’s the catch?

  • Bad News: vMug Evaluation licenses DO NOT cover the VCP-DTM 2020 blueprint technologies! Considering VMWare want people to have hands on experience with their products, but won’t let you spin up a lab environment at home to use their latest innovations, I found it pretty disheartening to realise I’d spent $200 but wouldn’t be able to setup a home lab for JMP components:

Is there any good news?

  • Sort of. You do get evaluation licenses for ESXi, View Connection Server, Identity Manager, View Composer and vCenter Server which will let you build a linked-clone lab environment and this will definitely help you . More on this further down.
  • Below pictures of what the software catalogue looks for vMug Advantage members:
vMugSoftwareCatalogue
vMugSoftwareCatalogue2


Step 2. Pass the vSphere Foundations Exam

The foundations exam is a prerequisite for the VCP certification and is a an open-book exam (not invigilated)  exam blueprint for vSphere Foundations 6.7 can be found here.

It’s worth noting that, you’re experience may be with Horizon, or vROPS, or some other suite of products – but the focus of the Foundations exam is aligned with the VCP-DCV certification path– there are barely any questions on DTM related content. This threw me off (I failed it twice) – so be aware that you basically become ‘primed’ to study for the DCV path by virtue of undertaking the Foundations course.

Naively I had expected the Official Course Guide to provide a decent level of detail for what is covered in the Foundations exam but the book does not cut the mustard.  I ended up relying on the below resources far more than the OCG, so below are my recommended study materials in order of preference. Good luck!

Study Materials for vSphere Foundations 6.7 2019

VMwareKnowledgeBaseLogo

Undoubtedly the best resource you can use if the VMware Knowledge Base ; remember to filter each article by the release version you need. Exam questions are formulated from KB articles, so I recommend prioritising these as your primary material before referencing any related books, websites, third party study guides.

TechnicalPapers

VMware Technical and Whitepapers cover Best Practice, Details Design Documents (DDD’s), Overviews and Explanations of all things VMware. I’d covering each exam topic but equally, taking notes from each paper for real-world application. Ask yourself which vSphere features your current client or workplace utilises and consider the ‘why’ behind each design decision. This’ll make your study a lot more relevant.

VMTN

VMware Technology Network is a useful forum area moderating by VMware staff and there’s plenty of real world Q&A to reference.


Recommended Study Books

Mastering VMware vSphere 6.7 – Nick Marshall
MasteringvSphere

Useful for: a great deep-dive reference into each feature in vSphere 6.7. Contains implementation steps, explanations and recommended practice for every feature covered in the Foundations exam blueprint.


vSphere 6 Foundations Exam Official Cert Guide – VMware Press
vSphereFoundationsOCG

Good for: Giving a primitive understanding of each technology area. However, this book is littered with mistakes – from grammar to incorrect question answers and dodgy screenshots from legacy versions of the web client. It’s written in a conversational tone which is great, but massively let down by its brevity and lazy proofing. I suggest you don’t rely solely on this book (as I did…).


Building A vSphere Home Lab On Your laptop!

This guide to creating a complete VMWare home lab on your laptop is truly excellent. You build an 2-node vSphere home lab and can run it entirely embedded environment on your home laptop. You may need to buy some more RAM to accommodate it , but it’s money well spent and you can utilize your vMug evaluation licenses to run the latest vSphere components at home! In relation to the exam, it is well worth going through the motions installing and setting up the ‘core’ vSphere and Horizon components – this aids massively for both exams – believe it or not, there’s plenty of exam questions (in Foundations and VCP) focused around what happens during installing or what options/steps are built into the install process.

As a guide, I have a Dell XPS 15 i7, 32gb RAM, 500gb SSD (free space) and was able to run 2xESXi node w/ Composer and Connection server.

Step 3: What is the VMware Horizon 7: Install, Configure, Manage [V7.7] – On Demand training ?

Bearing in mind my experience will give a slight bias to this information – I have around 6 years experience with Linked clones, AppVols, and 1yr with Instant Clones and UEM  in large enterprise environments. I personally found the training to be a bit below par considering the cost and I had higher hopes considering this is meant to be the ‘Real McCoy’ training bundle.

I paid £3000~ for the On Demand training, and yes that price included the vMug discount – and yes, I did feel like an absolute vMug for paying that. However, given my employers have paid me good contracting rates for several years, it was a small investment in the grand scheme of things, and I wanted to compare how they perform as a training provider and gauge how much new knowledge would be imparted to me for paying that kind of premium.

Course Delivery

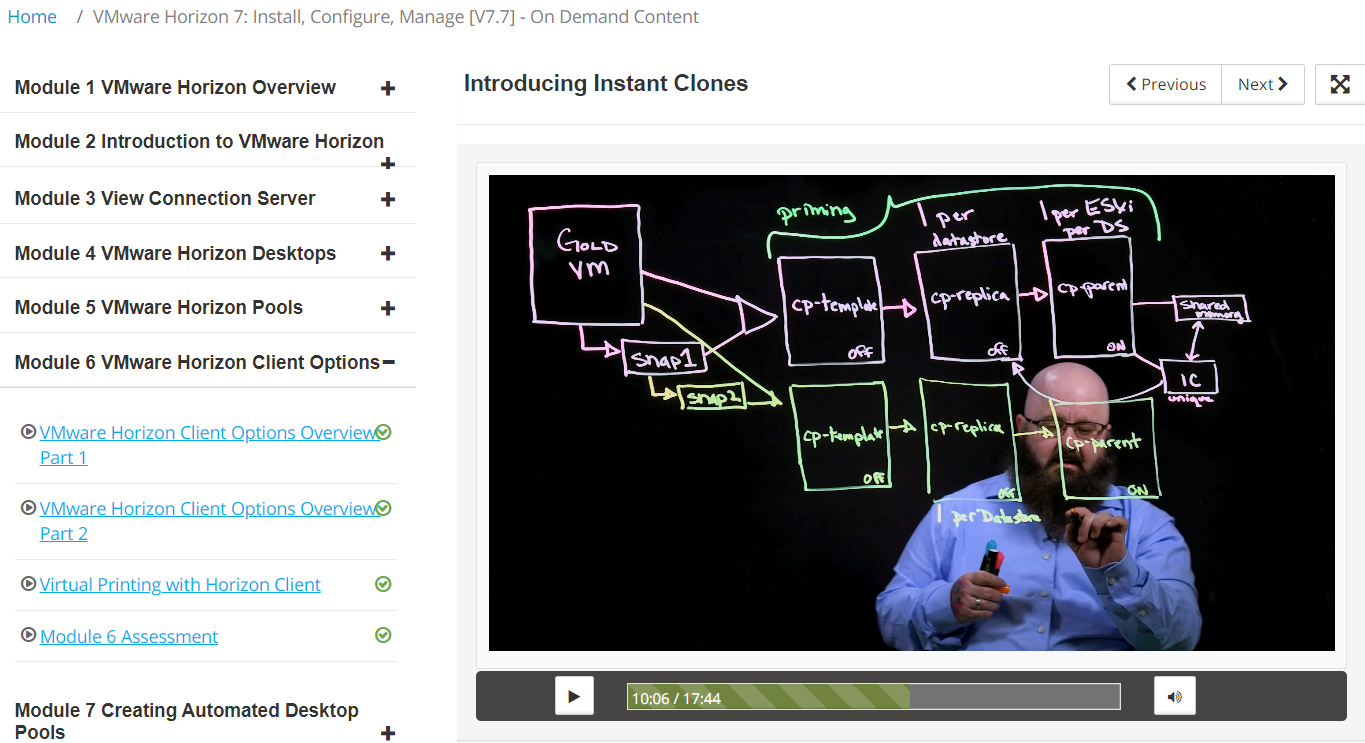
The training modules are hosted on the VMware Learning Zone portal, and broken down into 10-15 min videos with Linus Bourque taking you through (nearly) all components of Horizon, but not all DTM exam topics are covered in the Horizon 7.7 On Demand course. The below screenshot is an example of what to expect.
VCPDTM_OnDemand

The delivery is sometimes a bit predictable – the instructor generally parrots what is written down on the slide adding some colour occasionally, however, the slides do cover about 70% of the course in high level, but I’ll reiterate vROPS and Identity Managerare not covered in the training or labs. It took me around 16 hours to complete the entire On Demand course.

Assessments

Each module has a few multiple choice questions which do not count towards your qualification. There is a Final Assessment after you complete all the labs and training videos which is covered further down this page.

My opinion?

For the more experienced Horizon admin 5+ years, I think you could skip this and save yourself the expense – but if you’re keen to have the VMware stamp of approval and be ‘fully’ certified, then you’ll have to pay for it. The training does hit the mark for someone with 6 months -1 year hands on experience of Horizon, which is what it’s geared for – you’ll get a good overview of the features of Horizon, what it can do, how it operates and you can walk away with that ‘how can I apply this at work?’ feeling.

For the more experienced administrator, I would avoid paying for it at it’s current price . Particularly if you can combine a home lab setup (for View Composer, Linked Clones) with real world experience in an enterprise. Personally, I will be avoiding paying for anymore VMware training for future VCP certifications. I preach as short sermon on my opinion of vendor training in general at the bottom of the article.


What are the On Demand lab exercises like?

When you give away £3k you half expect to be granted some decent learning experiences in return , after all, the fee is equivalent to 1 term at university – so what do you get?
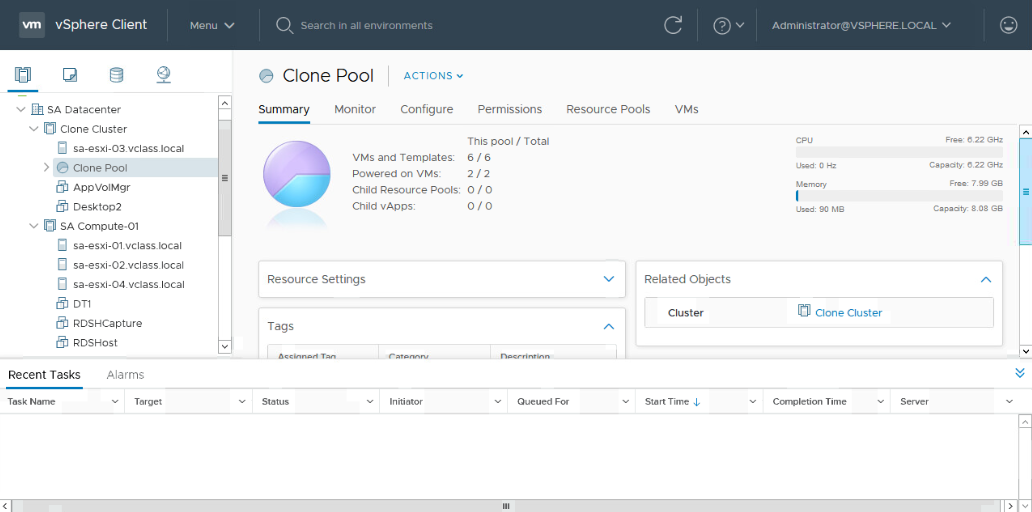
VCP-DTMLabs

A vSphere environment with RDSH hosts, AppVolumes Manager, UEM and Win10/Win7 VM’s for creating Linked and Instant Clone pools.

This covers around 70% of what you need to study for the certification, but it doesn’t have any infrastructure for Identity Manager and vRealize Operations Manager – more on this later.

The tasks set during the labs are basic and anyone with 1-2 years experience will have already performed 99% of what is asked of you. Some example tasks include – installing the Horizon Agent into a master image, running OSOT to optimize the OS, create an AppStack and assign it, create an Instant Clone and Linked Clone pool, install UEM (now DEM) and test it – in short, much of the bread and butter tasks to stand up a Horizon environment.

Room for improvement?

Yes. If you want to give customers value for money, I would expect more real-world tasks to be included in the training (isn’t that the idea?).  It’s also disappointing that vROPS and vIDM isn’t covered at all in the training or the labs – but accounts for about 30% of the exam? In general, the labs cover installing the components but not ‘from scratch’ as its target audience may have expected. Typically the server or manager element for a service is already setup, and you’re tasked with installing and configuring the agent component into a desktop.  If VMware took the time to add a few extra steps to their existing walk through’s it would build a richer learning experience, and I think they fall short on this.

Suggestions for improving the labs

-Install and configure View Composer – create a DB and ODBC, install Composer, point it to the DB, link it to vCenter. This would help prime te understanding of the high level steps needed to configure other Horizon component likeAppVols, vCenter, View Connection Server.

-vROPS and Identity Manager are completely ignored. There is zero information in both the training and labs that covers Identity Manager or vRealize Operations Manager. The exam blueprint includes these topics but you are you’ll have to use the free VMware Hands On Labs (HOL) to familiarise yourself with these technologies and read the KB articles around installation and configuration.

-The DEM (UEM) labs should include how to create predefined settings, writing application templates, how to use the application profile tool and configuring Horizon Smart Policies, to name a few.

-How to update an AppStack and edit it’s properties to mount on different OS’s – valuable for techies involved in OS migration projects!

-How to create an instant clone RDSH farm and app delivery mechanism.

What is the VMware Horizon 7: Install, Configure, Manage [V7.7] – On Demand Assessment?

At the end of the On Demand training course there is a ‘Final’ assessment – don’t be worried by the ‘finality’ of it – it’s a 95 question assessment which repeats all of the questions from the earlier end of module tests – so you’re answering questions you’ve already experienced! Bonus: for each question you have the opportunity to correct your answer twice, so there’s a pretty low chance of failing this, but if you passed each end of module assessment without trouble, you will be fine. As far as I am aware, it can count towards being VMware Certified.

Step 4. Prepare and Pass the VMware Professional Horizon 7.7 Exam to achieve VCP-DTM 2020 Certified Status

If you’ve paid for the On Demand training course, you will receive a free attempt to sit the exam. If you choose not to undertake the training then you’ll need to schedule the exam through Pearson Vue and pay $250 per take. If you fail, you have to wait 7 days before your next resit.

Is the On Demand training enough to sit the exam immediately after completing it?

No it’s not, before you start revising for VCP-DTM 2020, watch the video series: Horizon 7.7 Professional Exam Prep in the VMWare Learning Zone. The video cites numerous VMware papers to reference for revision and as a silver lining, the presenter makes several exam question slips along the way .

My usual tact is to read the ‘Install/Configure/Overview-flavour’ KB articles of the given topic and make notes from these and then refer to books and third party study guides to reinforce your notes. Also, try to image the type of exam question that could be formulated from the KB article you’re reading.Equally, VMware can’t test people deeply on technologies that aren’t easily accessible through vMug or an evaluation license – in our case Instant Clones, AppVolumes, UEM and RDSH – so work within these limitations by not pouring hours into the edge-case issues or configurations – because it’s likely it won’t get covered. Remember it’s a Professional level cert, not Expert/Architect/Specialist.

I would personally recommend trying to answer the following questions for each technology area in the blueprint, and also refer to the ‘By the end of the training candidates should be able to‘ list which is available alongside the blueprints for the training courses (not the exam blueprint). This list is included in my study notes (highlighted yellow bullets) available below.

For example, for AppVolumes:

  • What are the OS and database minimum requirements for install and/or any pre-requisites?
  • How do you install the manager/agent and what does a typical/custom/complete installation include?
  • How do you perform routine operations (e.g. creating, updating, deleting an appstack).
  • What are a few typical troubleshooting issues you might come across with this technology whilst installing/configuring it OR whilst deploying/using it? e.g. Appstack not mounting, what happens when a user vs computer assignment conflicts, writable volumes not attaching and so fourth, what causes the agent component to fail connecting to manager/server, and so forth.

I hope you’ve found this article useful in deciding whether to study the VCP DTM 2020. This concludes the article, but below are my thoughts on vendor training and how it could be improved. If you have an opinion on that, I would be keen to hear it

vSoapbox

Final Thoughts on IT training…

The following is not targeted at VMware , but IT vendors in general and their training methods. Most enterprise IT vendors have a team of staff with 100’s of years of combined experience between them; so why do the customers and learners continue to be subject to unimaginative examination and training experiences? Can you remember an Associate, Professional or Administrator level certification that gave you raw, technical skills that you were able to apply at work? I can’t. It’s pretty unimaginative and lazy in 2020 to be expecting people to memorise minimum requirements or what steps are correct to perform action X? – It risks the brand reputation and risks losing your target audience’s interest in the vendor/technology/IT, so why do vendors continue to fall into this trap? What purpose does memorising a bunch of settings serve that is not replaced by Google?

A thought; we live in the attention economy, so getting 100% of someones attention to read your course guides, study your products and write about it online (the irony is not lost on me) is massively valuable – look at the click bait industry! IT vendors have willing participants who will voluntarily pay to indulge in their product developments, buy their books and pour hours of energy into the hope it will give them cutting edge skills – so why do vendors not capitalise on this? Training presents an opportunity to convert a learner/customer into an ambassador/salesman/woman but only if the recipient receives what they are looking for or what they have paid for – real world, bill-paying skills. If vendors took time to tap into their in-house support functions and correlate what common problems they see with their products, understand what real world customers are doing with their tech and how it addresses business needs, then ask themselves, how can we incorporate this into our training ? that would be a good start.

I feel there is a gaping void in the lower-tier certs to address this and I’m yet to study a cert from any vendor that has broken this mould. I can’t speak for VCAP, CCNP, MCSE, CCEE level certs as I haven’t worked on these yet (and my expectations are already marred – see the problem?). The age of the Pavlovian memory games must end!

Continue reading

How to Improve VDI Logon Times

Keep your house tidy!

MrsDoubtfire

It only takes a mouse click to break an environment – and recently I found myself trawling through log files to investigate slow logon times with VMWare DEM – the root cause was, as always, frustratingly trivial – a deleted AD group that was still being referenced in the DEM config,  but the steps taken to identify this can help you improve your VDI logon times across your estate (…assuming  your our employer cares about this!). The below principles can be used in any VDI environment with a profile management tool in place.

I’ve split this into 2 sections. The first section How to troubleshoot a logon issue with VMWare DEM includes the actual steps taken to fix aforementioned issue. The second section 5 Tips to Improve VDI Logon Times offers a few ideas to consider in your environment.

How to troubleshoot slow logon with VMWare DEM

  1. First we need to enable granular logging so we can see what is happening during the logon process. For VMWare DEM you can do this by creating a text file named FlexDebug.txt and copy this into the Archive\Logs folder of the affected user.  At logon, FlexEngine service reads the flag text file and logs at a more granular level to the FlexEngine.log file. Deleting the .txt file will revert your logging level back to INFO (or however it is configured in your DEM GPO).

Turn on debug logging in Profile Unity

Turn on debug logging in VMware DEM

2. Log the user out of any open desktop sessions, then delete their FlexEngine.log file so we have a clean log to work with.

3. Log them back on. Once the logon cycle completes, read through the timestamps of logon events and look for gaps of more than 1 or 2s.

Example 1

In total, the below log file shows a gap of 28s where DEM was stuck trying to process erroneous data. The first event is a failed AD group lookup that wasted around 12s over 2 events. The AD group had been deleted from AD, but hasn’t been removed from the UEM config settings.

DEMSlowLogonExample1

How to quickly identify a bad settings in your DEM config:

If you’re having trouble locating the offending setting in the GUI of DEM Management Console, then save time by searching the .ini config files directly:

  1. Browse to your UEM Config folder.
  2. Use windows explorer search bar and type content:  to search for whatever text/setting/error/AD group/value is failing to process. This will search the contents of the .INI config files for your DEM installation and quickly identify where your problem lies.

WindowsContentSearch

Example 2

Citrix registry value ‘LogOffCheckSysModules’ exists, but does not contain ‘FlexEngine.exe’

This error is caused by an AppVolume package (Adobe Professional) which created the above value in HKLM registry tree. Updating the AppVolume package and deleting the above registry key fixed this.

DEMSlowLogonExample1

Issues like these cause overhead on your service desks, remember to keep your house tidy and have regular check-up’s on your logon times. 

Continue reading

Profile Unity Login Sequence and Execution Order

During a desktop login, often you need something to complete before another thing commences, this is often referred to as the execution order or login sequence.

Synchronous and Asynchronous processing is a tool that can help tweak the order in which a login is executed. The below example refers to the Application Launcher module in Profile Unity and the information is taken directly from Liquidware Support.

Asynchronous = Script 1,2 and 3 are executed all at once and left to run their – launch and forget  about it! These scripts run as the rest of the desktop continues to load.

Synchronous = follow a predefined order. In Profile Unity the sequence number in the drop down menu defines when the script launches. Of course this is also dependent on the Filter that’s in play.

Question and Answers on Profile Unity Execution Order:

If Asynchronously is not selected the logon process will be paused until this process is finished and exited) – Does this mean that ProU will wait until ALL non-Asynch scripts are completed before it moves onto the next module?
Yes that is correct. The non-async script will wait until finish before launching next non-Asynch script and it will wait to finish before moving on to next module. (Note: the script could be launched During and After configuration).
For example, if we have 10 scripts, 5 of them with Asynchronous not checked, does ProU group these 5 scripts together and start them all at once (or by their ‘order’..?) and then wait for them to complete?
It starts them one by one and waits for them to complete before starting another script.
Profile Unity Login Sequence:
Computer Start-Windows load
Computer GPOs load
Windows Startup script – LwL.profileunity.client.startup.exe – This script updates the version of PU checks make sure there is no bad userinit.exe registry key in place etc.
(Idle waiting for user to login)
User login
User GPO’s run applying to the user
(After they finish running/applying)
userinit.exe runs
Pre-ProfileUnity logn scripts run (PU module- User defined scripts)
Client.exe and all modules from configuration (Left to right):
.
.
.
Application Launcher runs
(if Asynchronously is selected it will load next script/module without waiting for it to finish)
(if Asynchronously is not selected the logon process will be paused until this process is finished and exited)
Rest of the modules are loaded (Left to right)
.
.
.
Post-ProflleUnity Logon scripts are run (PU module – User Defined Scripts)
.
Then ProfileUnity client loads c:\windows\system32\userinit.exe which is actually desktop and explorer.exe
.
Then we run any rules that were marked to run (Post logon) that could be portability/printers/drive mappings etc.
Debugging Tool?
This tool can be helpful for debugging Profile Unity login issues

How to configure a Cisco 3560 switch etherchannel or port channel

Recently I was asked to configure a switch to be used by our help desk staff for imaging new PC’s via PXE boot in preparation for a desktop roll out. Despite passing a CCNA and having some hands-on experience as a 2-and-a-half-line engineer, getting hands on with something is far more valuable than book theory.

This post aims to give you some best practice tips, links and help you avoid all the pitfalls I met whilst configuring a port channel/etherchannel on a new switch.

The below covers how to create a layer 2 VLAN extension using an etherchannel on a new switch. The etherchannel will link to a ‘main’ switch or incumbent switch, the purpose of doing this was to create a build area for PC’s to PXE boot for imaging in isolation from our production switch.

The encapsulation protocol is LCAP and it also contains some tips for troubleshooting if your etherchannel fails to reach an UP/UP state at both ends.

Part 1 – Switches are just a big text file

The prereqs were as follows –

  • Reset the local password (aka password recovery in IOS) and clear the old config.
  •  Create a Layer 2 Etherchannel (or port-channel, both terms mean the same thing in IOS lingo – thanks Cisco).
  • Test it, then light a cigar!

Getting Started/High level steps:

  1. Plug the switch in. Have a laptop with Z-Term or Putty installed. You’ll also need  a console to USB cable because  switches are so cool, they don’t use USB or the kind of connection you’d like them to 🙂
  2. Plug your Console to USB into the Console port on the back of the switch.
  3. Set your connection settings to 9600/8/1 and press return (if using z-term) if using Putty, select your Serial connection and repeat.
  4. Once your connected, follow the below blog on how to reset the password. Cisco 3560 Password Reset
  5. I assume you know a bit of IOS here, if you don’t, just lift it from the attached config at the bottom of the post. The basic steps are:
    1. Wipe VLAN.dat file – this will clear all stored VLAN information on switch and reload the switch.
    2. Set the hostname, domain name, and turn off DNSlookup.
    3. Configure a couple of local user accounts – make sure these match your organizations standardised user accounts.
    4. Configure the virtual-terminal lines i.e. how the connection behaves when you remote connect via Putty/Z-term connect to the switch.
    5. Configure the etherchannel, encapsulation protocol, and bundle in the interfaces that will be used in the channel.
    6. Test!

The config for setting up an etherchannel on a new switch is pasted at the bottom of this page.

Troubleshooting a Layer 2 Etherchannel

Here’s the annoying stuff that’s going to stop your etherchannel from showing UP/UP at both ends of the link. The attached config bundles 2 interfaces into a port channel using LACP protocol to negotiate the channel. Here’s the pitfalls that caused my Etherchannel to fail:

  • Pruning – I only wanted VLAN 100 traffic to be sent along the port channel. By adding pruning via command: switchport trunk allowed vlan 100 I actually caused myself more problems. Try omitting this if your channel fails and instead, allow all VLAN traffic to traverse the link.
  • Encapsulation mismatch – When adding an interface into a port-channel, it  should inherit the settings of the channel (i.e. it’s access mode will change to trunking and it’s encapsulation method to dot1q). Sometimes this doesn’t work and you need to explicitly set either the interfaces bundled in the port-channel, or the port channel itself to trunk. Also, check the encapsulation method on the port-channel, it should be dot1q.  Use the show log command to see encapsulation mis-match errors on interfaces.
  • Protocol mismatch – decide between LACP or PAGP and make sure your port-channel is using the agreed protocol at both ends. A mismatch between the encapsulation modes active/passive/on/desirable/auto = fail to trunk.
  • The port channel won’t negotiate or LACP fails –  Try doing a no shut on the port channel first. Then, no shut  against the interfaces that are bundled into the port-channel in unison example: interface range gi01-2 to select your channel member interfaces, then shut , no shut. 99% of the time this put the channel into an UP/UP state.


Config to create an etherchannel on the new switch:

#erase current config#

wr erase or erase startup-config
reload

#erase vlan data#

delete flash:vlan.dat
reload

#set STP priority to low (highest number) so the switch doesn’t become spanning-tree master for the VLAN instance you’re extending set mode to rapid-pvst. enable portfast (this will force ports to forward as soon as they’re up)#

spanning-tree mode rapid-pvst
spanning-tree extend system-id
spanning-tree vlan 100 priority 61440
spanning-tree portfast default

#set hostname and domain name, disable DNS lookup#

hostname YOURHOSTNAMEHERE
no ip domain-lookup
ip domain-name YOURDOMAIN.COM
vtp domain VTODOMAINHERE
vtp mode transparent

#set ip default gateway – *this is the Default gateway on your management VLAN*#

ip default-gateway XX.XX.XX.XX

#Configure the connection lines e.g. virtual terminal (vty), console, set the timeout, turn off the on-screen logging (logging synchronous) and optionally, set the privilege level for the line. 15=admin, 0=read only 1=user exec#

line con 0
logging synchronous
line vty 0 4
exec-timeout 600 0
privilege level 15
logging synchronous
length 0
transport input all
line vty 5 15
login authentication cisco

#create the desired VLAN the etherchannel will extend, this VLAN should be present on the switch your port channel links to#

vlan 100
desc VDI

#create a new etherchannel 10, (number is unique) set encapsulation and set mode to trunk#

conf t
interface Port-channel10
switchport trunk encapsulation dot1q
switchport mode trunk

#assign 2xports to port-channel 10, add descriptions and use LACP protocol for the channel (the active statement defines this)#

conf t
interface range GigabitEthernet0/23-24
description **Uplink to Adjoining Switch**
switchport trunk encapsulation dot1q
switchport mode trunk
channel-group 10 mode active

#verify etherchannel status, if they show (P) they are bundled into a channel=success,#

show etherchannel summary

#create local user accounts#

conf t
username AdminUser privilege 15 secret PasswordHere

#assign the spare ports on your build switch to the VLAN you are creating, set mode to access ports#

int gi1/0/1-22
switchport mode access
switchport access vlan 100

#ensure all the access ports have PortFast enabled explicitly on the port (as well as in the aforementioned spanning tree instance). The below may not be accurate#

int range g0/1-22
spanning-tree portfast enable

#write to config#

wr mem

VDI Gold Image Maintenance – Adding Microsoft Office Add-Ins And Managing Load Behavior

I’ve spent a couple of years learning from scratch (with no prior knowledge of VDI environments) how to package applications, common stumbling blocks, best practices and picked up some very handy tricks along the way, which I’ll share below.

This post gives a newbies understanding of what non-persistent VDI is, what application layer is/does, and how to add Microsoft Office Add-Ins into your gold image.

What  are non-persistent VDI desktops?

Non-persistent desktops mean when you log off, the desktop is destroyed and rebuilt from a template. A persistent desktop means you can log back into the same machine (be it virtual or physical).

A primer on persistent vs non-persistent desktops

What is a master image or ‘Gold image’?

The master image or ‘Gold Image’ is a template that will be cloned to produce your virtual desktop. It contains the chosen OS (typically Windows or Linux), core applications  that are required by everyone in the business (typically MS office, plug-ins, anti-virus and any bespoke business apps that cannot be controlled or added at a later stage). To create a gold image there’s a number of best practices to follow. Read about How To Optimize A Gold Image

What is application layering?

Layering is the technical name for adding another application to a desktop without manually installing it. Common technologies in the marketplace that perform layering (in one way or another) are Microsoft App-V, VMWare Appvolumes, ProfileUnity FlexApp , Citrix XenApp – these tools can visualise an application for streaming/mounting/layering into a desktop that is cloned from your master image. This allows you to provide staff the software they need, when they need and retain control of the licencing, patching, updating and versioning of the software your company uses.

Liquidware’s Application Layering (FlexApp)

Microsoft App-V Overview

VMWare App Volumes

Why use layering? I like installing it!

Over time it’s easy for a typical desktop computer to become a graveyard of applications. A typical small company might have an IT estate of 20-50+ physical computers, each with different software installed on them based on ad-hoc requests from staff. This represents all kinds of challenges (licencing, maintenance, patching levels, vulnerabilities) and, what if someone decides to hot desk without taking their PC with them? Moving your IT to a non-persistent, virtual desktop model lets you work from anywhere,  from (just about) any device.

A bit about virtualizing your apps…

Citrix Application Layering Explained

Given what we’ve learned  so far, app layering sounds like the golden bullet for desktop delivery but it’s not quite the case. Lots of applications designed for Windows call upon files and frameworks that sit within the operating system (C++ libraries, .NET frameworks, Windows patching/OS files and .dll’s…you name it) – although a layered application can still read these files in the OS, you’ll often find apps that require Windows features like .NET Framework or a specific Microsoft KB update patch, and typically these cannot be virtualized using layer and must be installed into your image.

It’s important to try to discover what is installed in your current desktop estate per-use case. Each business will have dozens of use-cases, before you can move to a virtual platform you need to understand what your base image should contain.

 I recently discovered we could not package Microsoft Dynamics CRM Outlook 2011 plugin using FlexApp because it relies on Windows Foundation Identity service amongst other bizarre Microsoft prerequisites. 

We were forced to add the plug-in into the company’s master image, and find a method for toggling it on/off for those who required it…

Installing a Microsoft Office add-in on your Master Image and controlling load behaviour

  1. Find out how to control the load behavior – the best way to do this is to use the registry. All applications write to the machine registry when they’re installed.
  2. Open run > regedit
  3. In this example we’ll look at a Microsoft Office Add-in. Browse to HKEY_Local_Machine\Software\Microsoft\Office\Excel\AddIns (the other suite apps will have their own keys within the \Office\ Root. This location is also valid under HKEY_Current_User. Some vendors use locations like HKLM\Software\VendorName
  4. Search the registry for ‘LoadBehaviour’ or ‘Behavior’ or the plug-in name – we want to first find the key that controls it, then test if it works.
    1. Typically the registry data value of 0 is ‘Disabled’ – the plugin will not load when MS Office is opened. If LoadBehavior=1 this is enabled.  Other values such as 3 are common – vendor documentation can inform you on what the values are and how that affects the plugin. Here’s an example
    2. Now you understand load behaviour, you can configure group policy to set the value in the registry (as a machine or user policy) based on which users you want the plugin to be enabled for.
      1. Example: Create a new GPO that uses User > Preferences > Registry that includes Enable and Disable load behaviours based on a user group membership.  If the user is a member of PowerPivotExcel then set the registry value under HKEY_Local_Machine\Software\Microsoft\Office\Excel\AddIns\LoadBahavior to 1 (enable). Create another policy preference to default  the load behaviour for all users to 0 – remmeber, we always want this plugin to be disabled unless somebody needs  it, so you must configure a default rule.
        1. Alternatively, you can set the load behaviour to 0 in HKLM settings when you first install the plugin. In a linked clone environment, your master image will be cloned with this default behaviour in place.

Application troubleshooting tools

if you have trouble finding which registry keys are changed during an installation these tools can help –

  1. RegShot allows you to take a before-and-after snapshot of your registry and see a historical view of file system changes.
  2. ProcMon provides a real-time log of all system internal processes.
    1. Ctrl+x to clear the log
    2. Ctrl+E to enable logging
    3. Then use the Filter option to sort the output by Operation >  ‘RegKeyAddValue’ or similar events. This can be used extensively for any other kind of troubleshooting, not just registry related.
  3. WhatChanged is similar to RegShot.

Removing Start Menu Short Cuts in Windows 10

You don’t want all of your users  to see you’ve installed an app that they don’t use.

Removing Start Menu Shortcuts

Another location to check is %appdata%\Roaming\Microsoft\Windows\Start Menu

Best Practice Before You Deploy!

  • Check the vendors administrative guide for any command line switches that can be used during the installation to minimise this. Remember, most software developers like to receive as much data about how their product is being used which causes bloat and unwanted features to be included in a ‘default’ installation i.e. diagnostics being sent over your network. Always check the vendor’s installation guide for command line switches or tricks for disabling unwanted features. Be weary!
  • Is the default load behaviour set?
  • Does your method for enabling the plugin work?
  • Is the plugin the desired version, or can it be updated? Microsoft plugins can be patched and updated by running windows update.

Markit Wall Street Office – Packaging, Deployment And Tricks You Should Know!

If you use WSO you’ll know it’s a strange creature depending on how you have  your environment configured.

Administrator won’t maximise!


Occasionally WSO Admin might refuse to maximise on a desktop and sit in the task bar waiting to be killed off. This is often caused by the users profile data in SQL becoming smelly. To cleanse this, run the following script in SQL Management Studio against your WSO FCSCommon database:


Wipe my profile in Wall Street  Office

A more comprehensive script for cleansing a user profile involves running the following. Note – log the user out of WSO before running this.


Packaging Bloomberg Professional for VDI using AppVolumes or Liquidware FlexApp

download

The following post runs through how to install and package Bloomberg Professional for a VDI environment. The below example uses Liquidware’s FlexApp to do this, but the ideas below are applicable to AppVolumes with VMware DEM to manage the post-deployment script.

Version: This is intended for users of Bloomberg Anywhere and covers how to package and deploy Bloomberg Professional (Full Terminal).

Bloomberg Professional contains Office Tools (MS Office Add-In) and a full standalone desktop client.

Install on your capture VM

  1. Download the Bloomberg Full Terminal Installation  

2. Run the installer on your provisioning VM selecting Private IP Network as the environment type.

3. Launch the software and click past the connection wizard until you reach the login screen – you don’t want your users to see/do this!

4. Bloomberg has minimum requirements of Read/Write to the following HKLM registry key and subkeys. If you have UAC enabled, you need to set permissions against these keys to allow users R/W access to:

HKEY_LOCAL_MACHINE\SOFTWARE\Wow6432Node\Bloomberg L.P

These permissions can’t be captured using AppVolumes or FlexApp because they’re machine-level settings, so we need to use a post-deployment script to add the permissions to the registry after the app has mounted to the desktop at logon time.

There’s a few methods for doing this and at the time we

Configure a post-deployment script using subinacl

The following script should be saved as a .bat file.

1. Download SubinACL

2. Extract the subinacl.exe to a network folder that your users can access.

3. Create the post-deployment script and deploy it, there’s a few ways to do this:

For Liquidware FlexApp – add this script as a post-deployment script – see this guide: ‘App Package Scripts’ section

For AppVolumes –  ideally you should use DEM (formerly UEM) to run the script elevated, at logon or you may need to use Group Policy to run a logon script and scope it against the Bloomberg users.

Another (untested!) option, you could try editing the snapvol.cfg file within AppVolumes – if this works for you, please let me know!

The below can be copied into a .bat file to be executed after the application has been deployed to your VDI desktop(s).

\\youdomain.com\netlogon\AFolderShare\Scripts\subinacl.exe /subkeyreg “HKEY_LOCAL_MACHINE\Software\wow6432node\Bloomberg L.P.” /grant=Everyone=F

Tips:

1. Ensure subinacl and the .bat script sit in the same folder, ideally your netlogon share. If storing elsewhere, ensure the logged on user has rights to read/execute from that location.

2. Typically Bloomberg allows you to perform an APOD creation – this installs a generic license key which then lets a Bloomberg Anywhere user log in. If you need to configure this follow these steps: once you’ve installed the app on your capture VM, type CONN in the Bloomberg window to see the connection wizard. Under the Connections tab, click Submit. This will create a generic key code and allow the user to login using their Anywhere login creds

Bloomberg Minimum Requirements and File Rights.

3. Your Bloomberg users might not want the Office Add-Ins – to disable these, for ideas on how to disable office add-ins and manage load behavior

3. If your placing a shortcut to Bloomberg on the desktop, create this in: C:\Users\Public\Public Desktop 

4. Bloomberg requires updating every 3 months, add this to your maintenance schedule!